Metaverse: Your Gateway to Infinite Possibilities
What is a Metaverse?
Broadly defined, a Metaverse is an immersive, persistent virtual world, often experienced in 3D through virtual reality. In simpler terms, it’s a fictional, interactive digital space. You can think of it as the internet brought to life!
In the context of the Multiverse app, Future Tech Labs (FTL) is building more than just virtual spaces. We’re creating a powerful platform and ecosystem where users can build their own Metaverses. Our vision is to revolutionize how people connect with each other and the world around them by developing the ultimate browser for the 3D internet.
Metaverses in the Multiverse App
Multiverse empowers users to create and share rich, interactive Metaverses. Most of these worlds are accessible from the Infiniverse, the central 3D cityscape. However, discovery extends beyond that.
Multiverse Metaverses can be accessed in several ways:
Through user-owned properties and storefronts within Infiniverse,
Via the Discovery Menu, event portals, or member invitations,
Directly from the wrist menu, if you’re part of a specific Metaverse,
Through Deep Links and Launch in VR/Desktop options for sharing content outside the app.
In many Metaverses, you'll also encounter Multiverse AI Agents ready to guide you through the experience. These virtual assistants can introduce you to the Metaverse you're visiting, share insights about its creator, recommend other rooms and places to explore, and even inspire you to start building your own.
The Future of Browsing
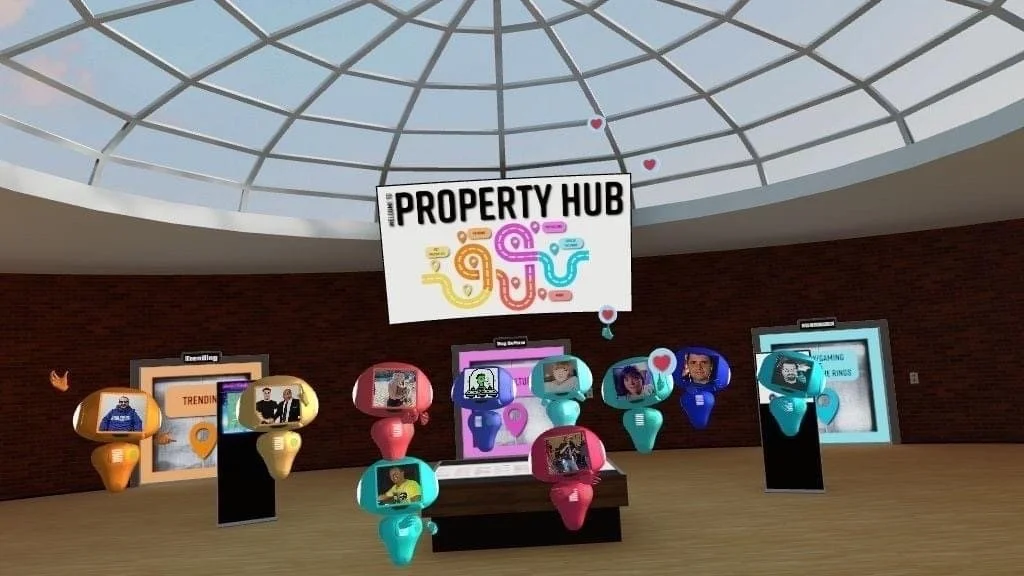
With an interconnected ecosystem of Metaverses, the possibilities are endless. Attend a live concert in one Metaverse, hop into another to pick up exclusive fan merchandise, host an interactive art gallery, guide students on a virtual tour, or unwind with new friends at a digital pub. All this, and so much more, is possible in Multiverse.
From teleportation hubs to brand showrooms, community clubs to educational centers — businesses and creators alike can find unique ways to share their offerings.
Infiniverse serves as the 3D hub linking all these experiences, acting as the bridge between people, content, businesses, and communities.

What’s Next
Multiverse is just at the beginning of its journey. As hardware and software evolve, so will the tools, features, and functionality available to users. The role of AI Agents will grow, enhancing exploration, creation, and interaction in ways we’re only beginning to imagine.
We're building toward a future where anyone can experience, create, and navigate the 3D internet — with more power, creativity, and connection than ever before.

Where to Start: Your Personal Metaverse
When you sign up and log in to multiverseonline.io, a personal Metaverse is automatically created for you. This serves as your default virtual space — housing all your initial property purchases, storefronts, and rooms. If this is your first time logging into your Multiverse Online account, be sure to check out our MultiverseOnline.io Guide.
Note: Apartments are always assigned to your personal Metaverse and cannot be moved to any other Metaverses you may wish to create.
Accessing Your Personal Metaverse
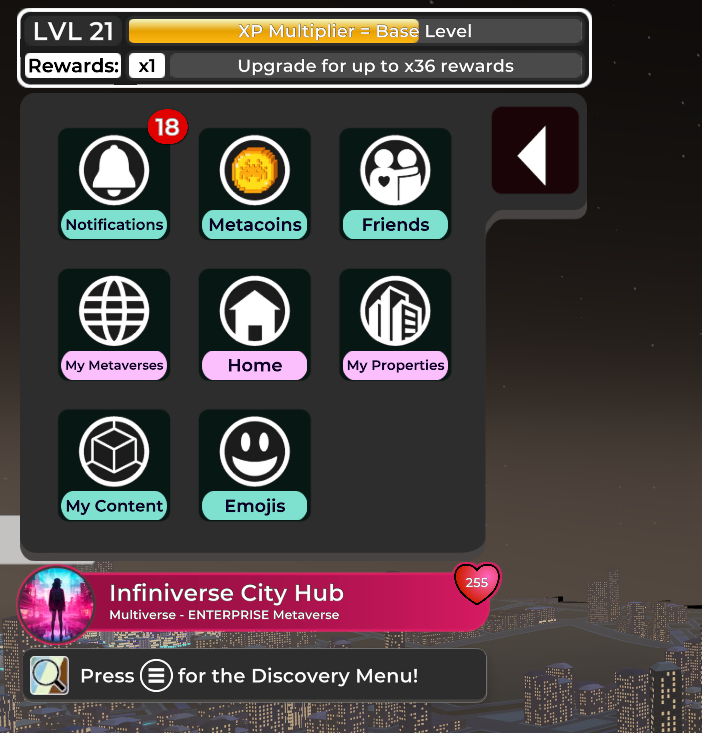
Your personal Metaverse is the first space you land in when you log into the Multiverse app. It's also linked to your "Home" and is always just a tap away:
Wrist Menu: Go to Metaverses or Me > My Metaverses, or simply tap the Home button.
Discovery Menu: Navigate to Metaverses or Me > My Metaverses.
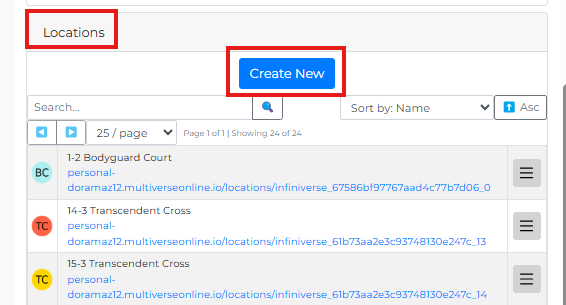
When first you log in at multiverseonline.io, you'll see the My Metaverse section prominently displayed on your homepage. At this point, you’ll have only one Metaverse (named after your username).
Just below your Metaverse name, you'll find a hyperlink that opens the list of locations within that Metaverse.
Creating Your First Spaces
At the top of your locations list, you’ll see a Create New button. This lets you add new rooms using a variety of templates.
Each location or room within a Metaverse is a customizable space — an opportunity to build immersive environments, upload your content, and define how other users experience your world.
By naming and personalizing these rooms, you’re shaping your own network of interconnected experiences.
Creating Multiple Metaverses
You can also create an entirely new Metaverse. Each new Metaverse you create is independent from the others. This means you can:
Keep personal and business content separate
Use different themes or purposes for different audiences
Assign each Metaverse its own subscription plan
Set your Metaverses to public or private access
Whether you're designing a virtual art gallery, a private hangout, or a company hub, Multiverse gives you the freedom and tools to bring your vision to life, even if you have more than one!

Subscription-Only Features
Some features and tools in the Multiverse app are exclusive to users with an active subscription. For example, video streaming and storefront registrations require the associated Metaverse to be on at least a Premium plan. Your plan also affects how quickly you earn XP and receive the associated rewards.
Additionally, your subscription determines the number of AI Agents you can craft, how they function, and where they can be placed within your Metaverse.
You can review the full list of features, benefits, and environments included for each plan here, and learn how to upgrade your plan in our Subscription Guide. For more details on AI Agents, check out our AI Agent Crafting Guide.
Storage Limits
When you first sign up at multiverseonline.io, you'll start with a free personal Metaverse. This Metaverse includes limited storage space, enough to get started, but as your Metaverse grows, you may need more.
Each time you upload content to your Metaverse, it uses a portion of your available storage. Once you reach the limit on your free plan, you’ll need to either:
Delete existing content to free up space,
Or upgrade to a subscription plan to expand your storage and unlock additional features.

How to Check Your Metaverse Storage Usage
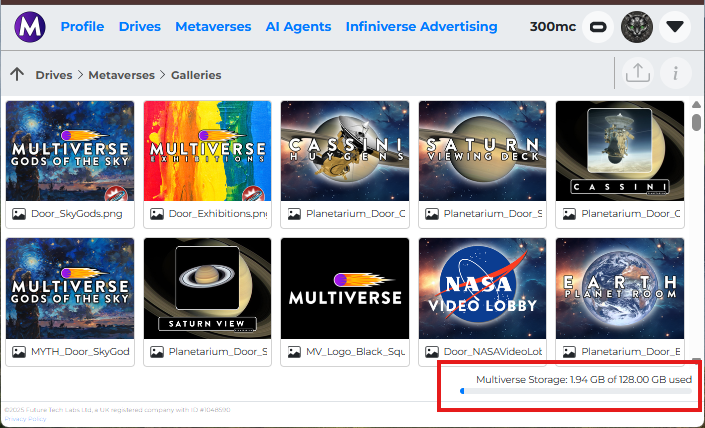
To view your current storage usage at multiverseonline.io:
Go to Drives (top left),
Select Metaverses,
Double-click on your desired Metaverse folder,
Look for the storage bar at the bottom-right corner of the screen.
This bar will show how much storage you've used and how much is available on your current subscription plan. Remember that your subscription plan applies to a specific metaverse.
Create and Customize a New Location within an Existing Metaverse
When you first create your personal Metaverse, it comes with a few starter locations to help you get started, including your Multiverse Home — the main room you land in when logging into the Multiverse app. By default, your Home Room includes three doors that take you straight to Infiniverse, Grand Central, and the Featured Event (if one is live), so you can begin exploring the broader Multiverse right away. Along with your Home Room, your personal Metaverse also includes two additional spaces: Rotunda 24 Doors and Sunrise Rotunda. You can access and personalize each of these rooms anytime at multiverseonline.io.
But this is just the beginning of what you can build! Your personal Metaverse, and in fact any other Metaverse you create, can grow far beyond the default rooms. You can easily add and link many more customized locations, like galleries, courtyards, theaters, studios, and meeting rooms, to design a fully immersive and interactive experience. Each room is created using a template, and every room comes with its own unique location link. You can assign these links to doors in any of your other rooms, apartments, or storefronts, allowing users to move smoothly between your connected spaces.

With a Free plan, you’ll have access to more than 20 room templates to start building. If you upgrade to a Premium plan, you’ll unlock over 100 additional templates with unique styles and layouts to choose from. This opens up exciting possibilities for designing one-of-a-kind environments and experiences.
Once your rooms are created, you can start personalizing them to make each space truly your own. You can upload your own images and videos, add custom AI Agents, and link doors to other rooms, websites, or even apps. Whether you're building a creative gallery, a social hangout, or a workspace, each room can be tailored to fit your vision. To help others discover and explore what you’ve built, don’t forget to update the Discovery Menu panel. This makes your rooms easier to find and encourages more visitors to check them out. Plus, your Discovery Menu description helps Multiverse AI Agents understand what your space is all about — so they can recommend and promote it to other users!
Follow a few easy steps to create and customize a new location in your Metaverse.
Step 1. Create New
Log in at multiverseonline.io, select the Metaverse, and scroll down to the Locations section. Click the Create New button to open the new location set-up page.

Step 2. Name Your Room
Give your new room a name, which will load a preview of the room URL (note, you can change the room name at any time, but not the URL). This URL is what you use to link other doors to your new location.
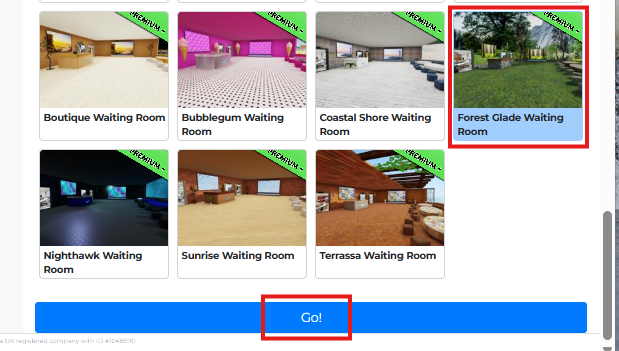
Step 3. Select a Template
Select your desired template (click to highlight it in light blue), then click the blue Go! button. Your new room is now live and ready to be customized, linked, or shared!

Step 4. Update the Name
If you’ve changed your mind about the room name, no worries! Click the pencil icon, type in the new name, and press Enter/Return to save. You can also update the round Icon for the room by clicking the “camera” icon.

Step 5. Edit the Settings
If you want to change room template, click the Change button in the Settings section of your new location page. Note: Changing template may require you to re-upload your wall images, as not all templates are the same. Also, some templates are only available to Premium subscribers.
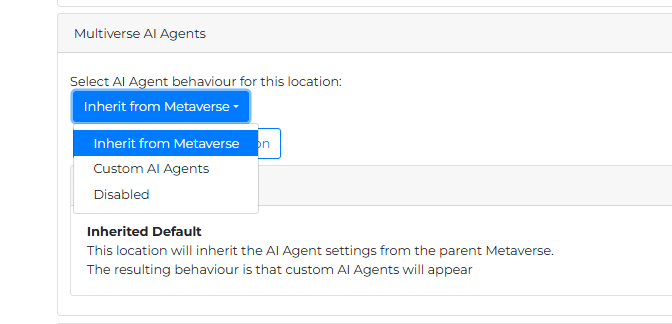
Step 6. Add an AI Agent
If your metaverse plan allows, you might be able to add custom AI Agents to your new location. This is managed from the top Multiverse AI Agents panel. For more details, visit our AI Agent Tutorial.

Step 7. The Discovery Menu
The next section is the Discovery Menu panel. Add a Featured Banner, Discovery Menu poster (Icon), and a Room Description so that your room is both discoverable and eye-catching on the Discovery Menu.
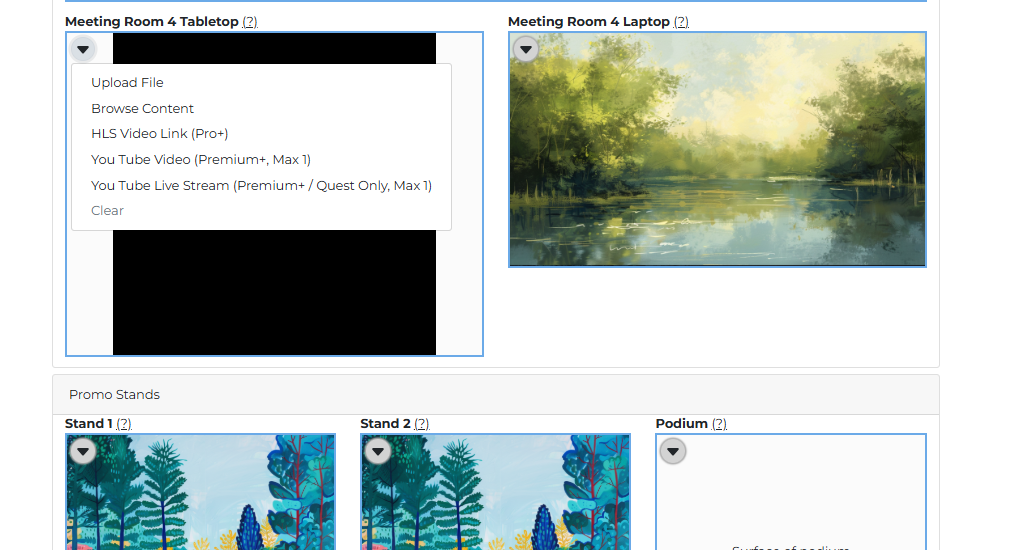
Step 8. Upload Your Content
Now it’s time to customize your room content. Upload images and videos, or add video/live streaming links to the available slots. Your subscription will determine which media and link options are available.
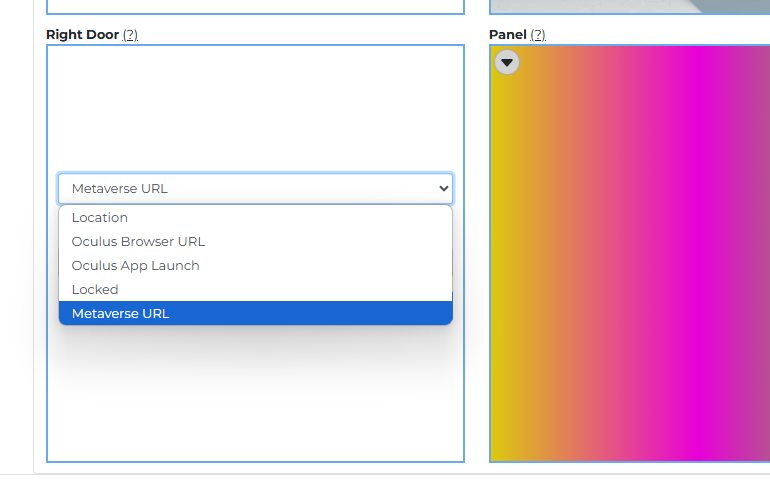
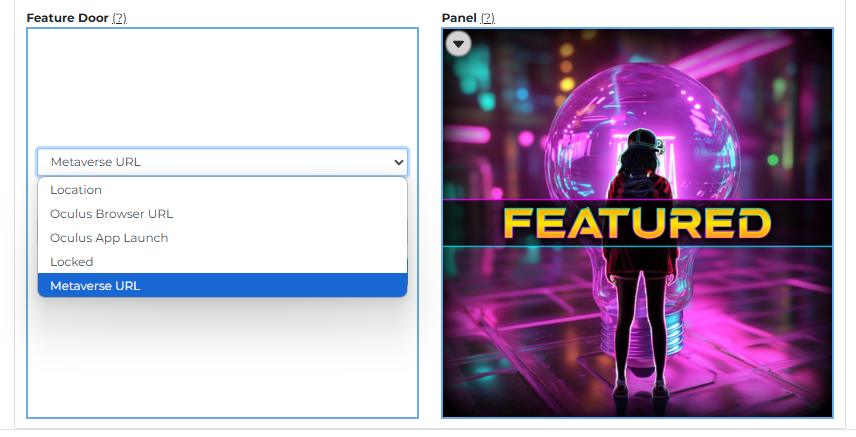
Step 9. Customize the Doors
Don’t forget to customize your doors! You can link them to (a) a specific location within your own Metaverse (Location); (b) an external webpage (Oculus Browser URL); (c) another app (Oculus App Launch); (d) or a location in any other metaverse (Metaverse URL).
All changes are immediately live within the app. Once you're done, log in to Multiverse to explore your creations in 3D!
Create and Customize a New Metaverse
Creating a new Metaverse is a great way to establish a dedicated space for a specific purpose, whether it's a business hub featuring all your professional rooms, a hobby-focused space to showcase your creations, or a fan club Metaverse where your community can hang out and make memories together.
Metaverses are highly versatile and limited only by your imagination. Your Multiverse account allows you to create multiple Metaverses. However, please note that once a Metaverse is created, it cannot be deleted, so only create a new one when you plan to use it.
Keep the following in mind when managing your Metaverses:
Apartments and penthouses are always tied to your Personal Metaverse.
New storefronts can be assigned to any Metaverse you've created.
Each subscription plan applies to a single Metaverse and covers all the rooms
and locations within it.AI Agents can be managed at the Metaverse level.
Metaverse members can access that Metaverse and all of its locations.

Ready to build your next space? Follow the steps below to create and customize a new Metaverse to suit your goals.
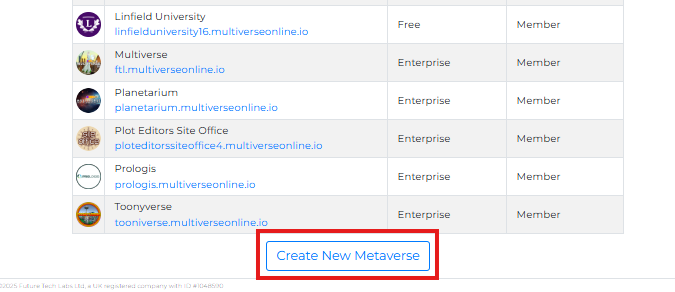
Step 1. Create New Metaverse
Log in at multiverseonline.io and then click on the Metaverses tab in the top right menu bar. This will show you an overview of all the Metaverses you have created or are a member of. Click Create New Metaverse.
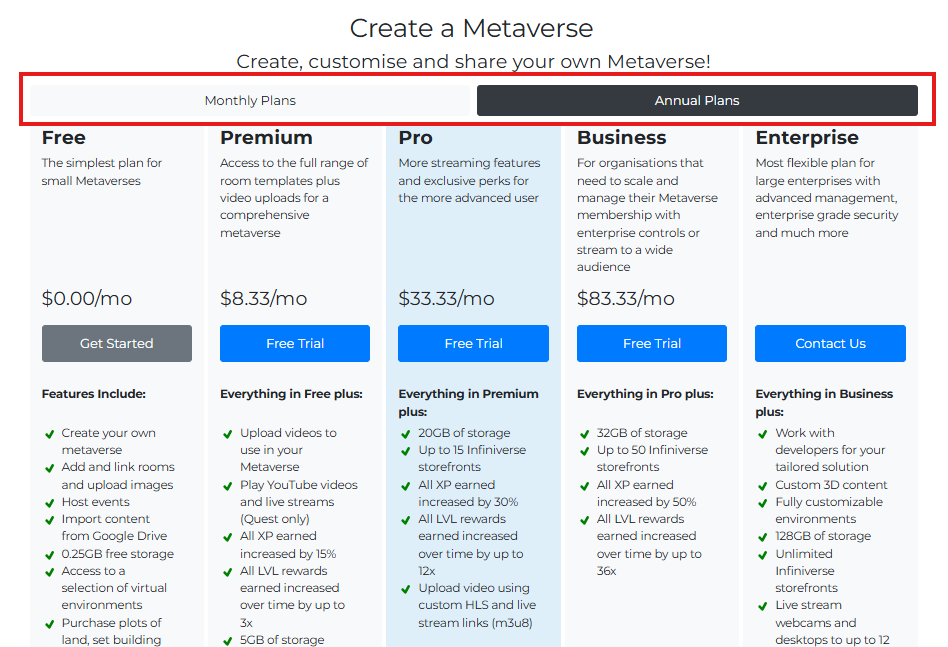
Step 2. Choose a Plan
You’ll be prompted to select the subscription plan for your new Metaverse. Choose between monthly or annual billing. Some features, such as storefronts, require a paid subscription, and you can always start with a free trial.
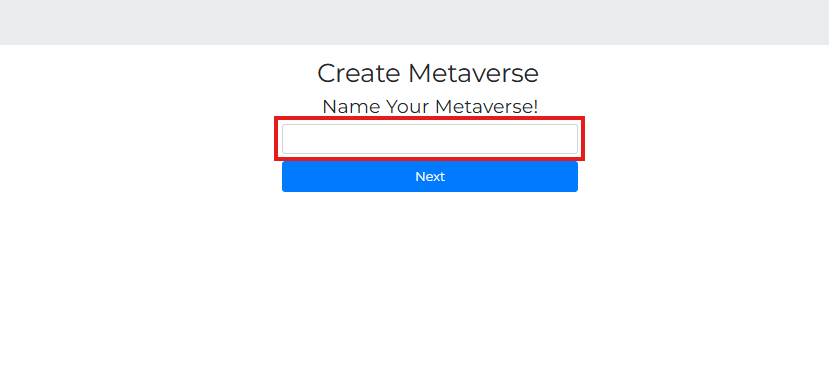
Step 3. Give It a Name
Once you’ve selected the plan, enter the name of your Metaverse. While the name can be changed later, the URL created will remain permanent, so choose your Metaverse name carefully!
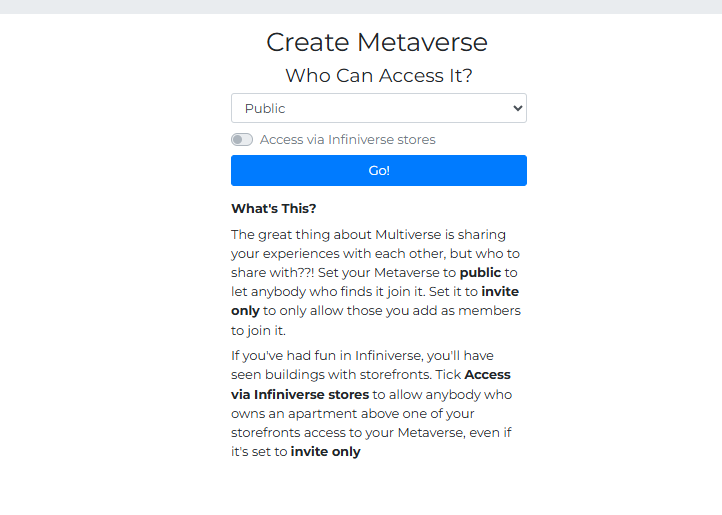
Step 4. Set Access
Next, choose your Metaverse access. Set it to Public if you want everyone to be able to visit, or Private (Invite Only) to limit access to members only. You can add or remove members at any time.

Step 5. Access via Store
For private metaverses, you also have the option to enable “Access via Infiniverse stores”. This means anyone who purchases an apartment above a storefront in that metaverse will automatically become a member. Learn more in our Exclusive Metaverse Tutorial.

Step 6. Hit “Go!”
Click the Go! button to create your Metaverse. Now, you can customize it with AI Agents, Discovery Menu content, and of course, add additional locations and rooms to your new Metaverse as you’ve just learned.
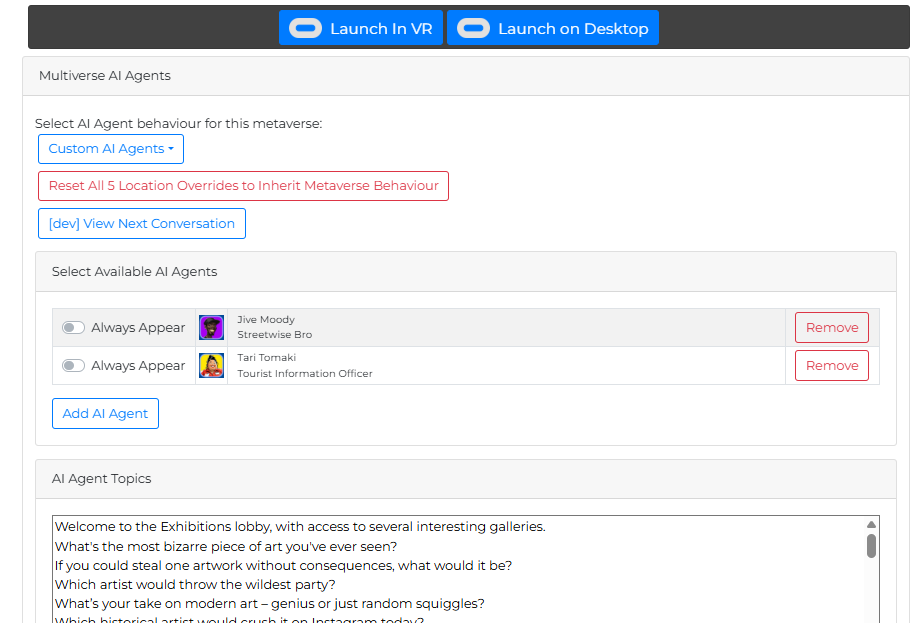
Step 7. AI Agents
If you have a Premium plan or above, you can assign an AI Agent to your Metaverse and across all of its locations. Manage your virtual assistants from the top Multiverse AI Agents panel, and visit our AI Agent Tutorial to make the most of this exciting feature.

Step 8. Discovery Menu
Don’t forget to update the Discovery Menu panel so others can find your new Metaverse. Add a Featured Banner, Discovery Menu Icon, and Metaverse Description to help it stand out on the Discovery Menu.
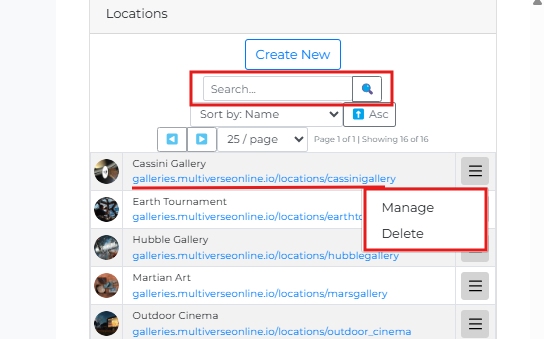
Step 9. Locations
To add new rooms to your Metaverse, scroll down to the Locations section. From here, you can create new rooms, manage existing ones, and search through all your current Metaverse locations. You can also easily copy the Metaverse URLs for each room from here.
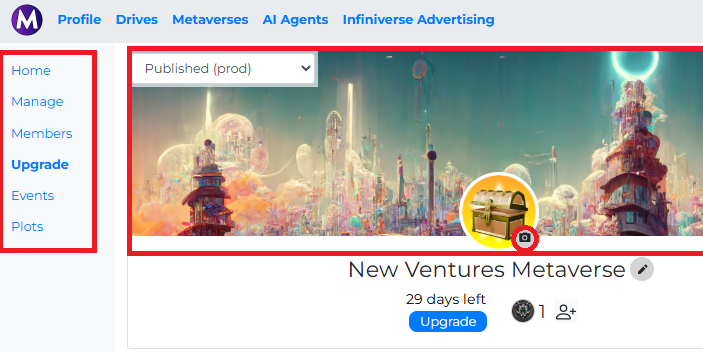
Manage Your Metaverse
You can manage every aspect of your Metaverse, from adding members to updating your subscription plan, anytime at multiverseonline.io. When you open your Metaverse, a menu bar on the left will give you access to key sections: Manage, Members, Upgrade, Events, and Plots (see the details below). On this main page, you can also customize your Metaverse’s banner and icon images by clicking the small camera icons. For best results, use a 4:1 image for the banner and a square (1:1) image for the icon, keeping in mind that the icon will be cropped into a circle.
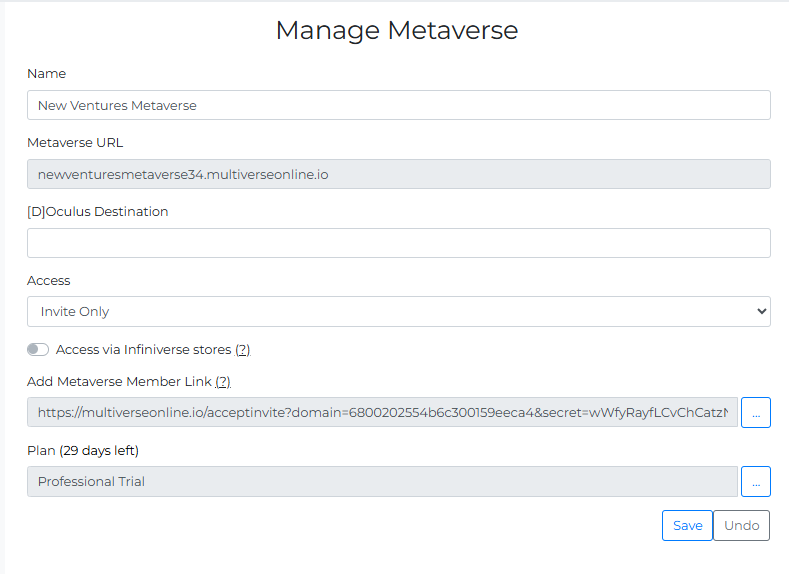
Manage
Name: Update your Metaverse name here.
Metaverse URL: Use this to link doors to your Metaverse.
Access: Change your Metaverse access to Public, Invite Only, or Invite Only via Infiniverse stores.
Add Metaverse Member Link: Create your member invite link by clicking the three-dot menu on the right, then share it with others you want to invite.
Plan: Upgrade or downgrade your Metaverse plan by clicking the three-dot menu. The delete button here does not cancel your subscription — it sends a Metaverse removal request. If you want to delete your Metaverse, first downgrade to the Free plan.
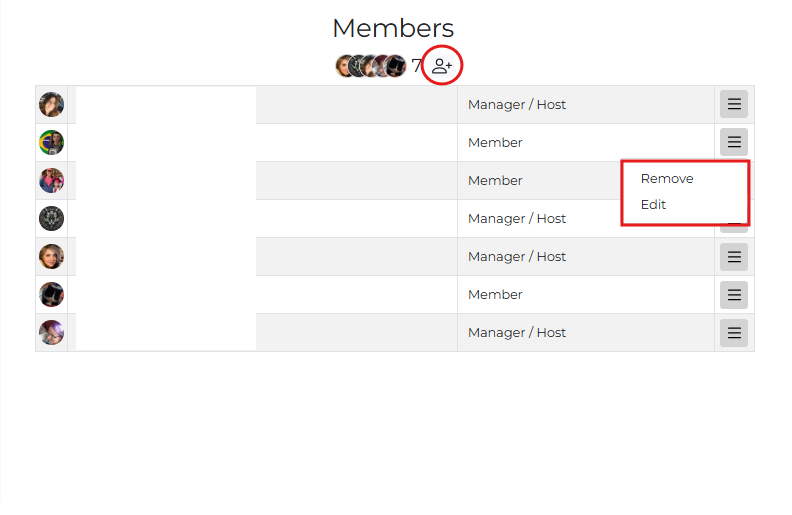
Members
In the Members tab, you can add new members and manage existing ones. NOTE: When you invite someone as a member of your Metaverse, they’ll have access to everything within it, including locations, storefronts, rooms, uploaded images, etc. Depending on their permissions, they may also be able to manage the content displayed in your Metaverse and its rooms.
Add New Member: Click the plus icon next to the current member avatars, then enter the email address associated with their Multiverse account.
Remove Member: Open the right-hand menu and click Remove.
Edit Permissions: Open the right-hand menu and click Edit to assign Manager or Host roles.
Upgrade
Click the Upgrade tab to upgrade your current plan (obviously!). If you're trying to downgrade, go to the Manage tab instead or check out our step-by-step guide on Managing Your Subscription Plan.
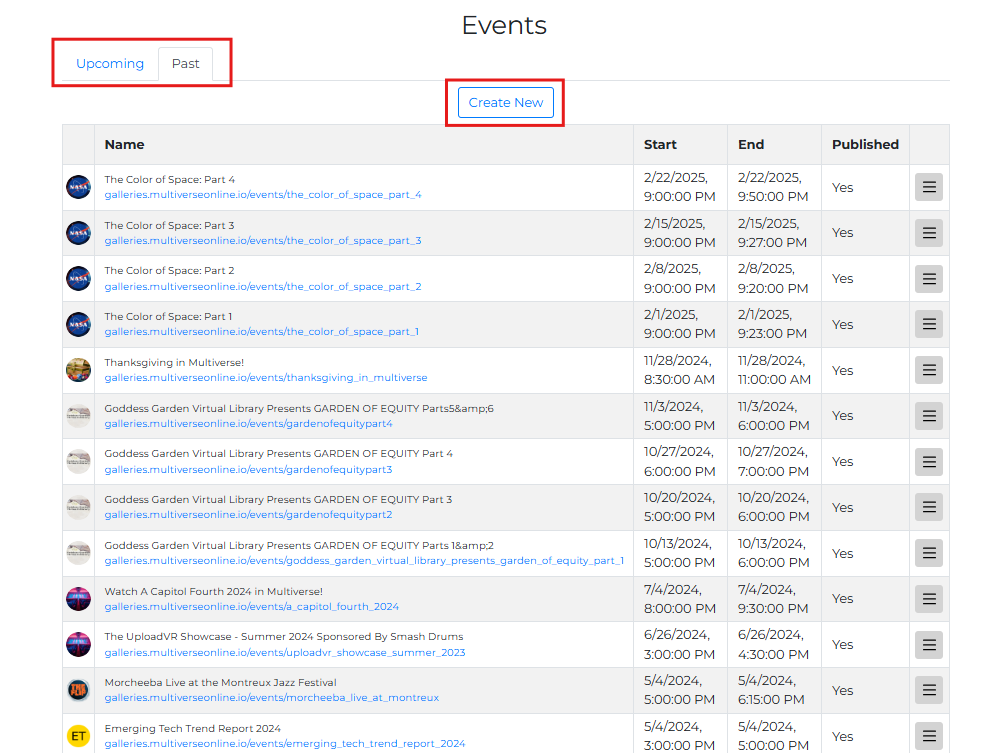
Events
In the Events tab, you can create new events and review both past and upcoming ones. Events can be hosted in any of your Metaverse locations, and each room can be customized specifically for the occasion. Hosting events is a great way to promote your Metaverse. To learn more about how to create Multiverse events, check out our Events Tutorial.
Plots
Access all of your purchased plots here. Open each plot to update:
Plot Owner Image: Click the camera icon on the profile picture.
Plot Name: Click the grey pencil icon next to the current name.
Discovery Menu Assets: Add images and a description to boost visibility.
Hub-Scraper Branding: If your plot includes a hub-scraper, upload a square image to the Hubscraper Branding slot to customize the top branding.
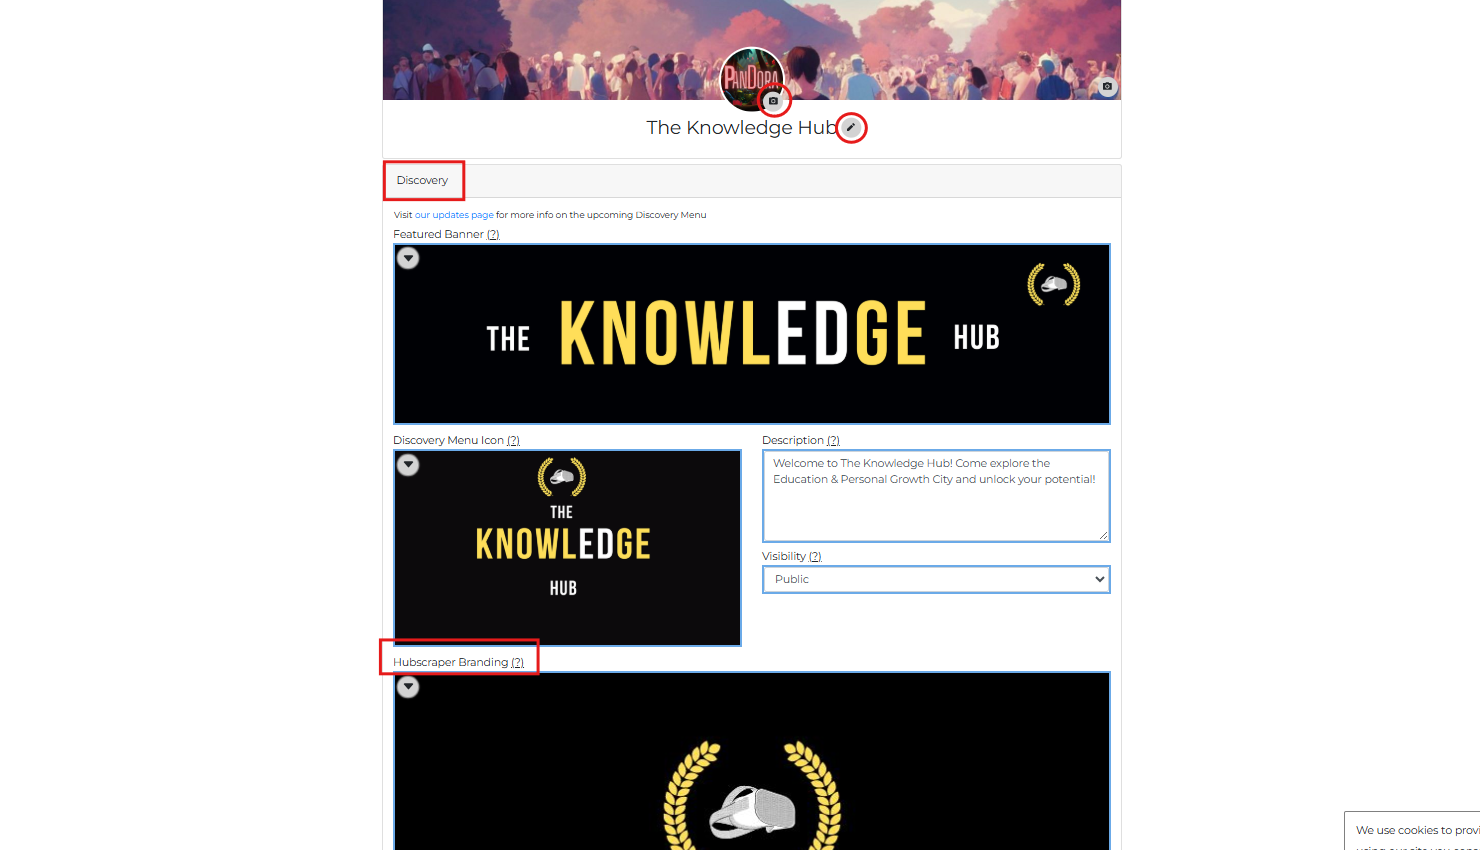
To learn more about how to edit the buildings and statues on your plot, read our Plot Editing Guide.
Link your Metaverses and Rooms with Multiverse Doors
Doors & Door Links
One of the most powerful features of your Metaverse is the ability to link rooms and locations together using Multiverse Doors. There are several options for what your doors can do. Click the drop-down arrow next to each door setting to see your choices:
Location: Select a destination from the alphabetical list of all locations within your own Metaverse.
Oculus Browser URL: Enter a regular web URL to open either the Oculus Browser (in the app) or a separate browser window (when using the PC version). Great for linking to websites or external content.
Oculus App Launch: Link directly to another app or game on the Meta Horizon (aka Oculus) Store. Just enter the App ID to connect! See below for how to find the app ID.
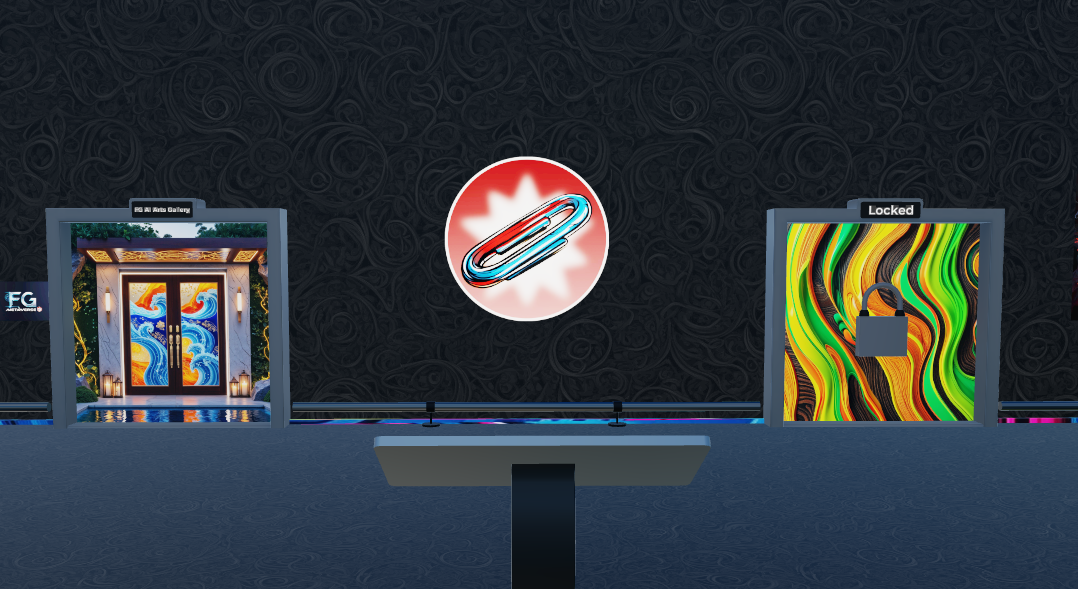
Locked: Lock the door to prevent access. Useful if the door is not in use or needs to be temporarily disabled.
Metaverse URL: Our most powerful linking feature — use this to connect to any location across the entire Multiverse, including other users’ rooms or public domains.
After selecting your door link type and adding the destination, click the Save button to apply the changes. You can use the Clear button to reset the door to its original state.
TIP: Update the square image on the right side of the door panel so users know where the door leads! Also, test your door in the app to make sure it works as expected.
Using Metaverse URLs on Your Doors
Whether the location is within your own Metaverse, someone else's, or a public space across the Multiverse, if you have the URL — you can link to it!
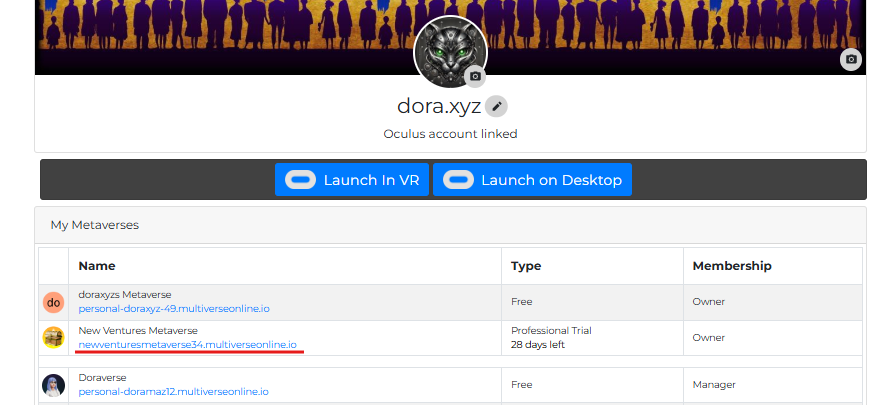
To find your Metaverse's URL, go to the Main Page — My Metaverses and find the URL in blue font, just below your Metaverse’s name.
To find a room’s URL, go to your Metaverse’s Home Page; room URLs are listed in blue font under the Locations section.
You can also copy the Metaverse/Location URL from your browser address bar: open the location page and copy the part AFTER https://multiverseonline.io/domains/.
Metaverse URLs Notes & Tips
A door linked to a Metaverse URLs will only be open for you if you have access to the destination or it is public.
For private Metaverses, you must be a member. If you’re not authorized, the door will display a lock icon and be inaccessible.
The lock icon will also appear if the URL is incorrect or mistyped.
When copying a URL, always remove the beginning part: https://multiverseonline.io/domains/
A personal Metaverse URLs should start with “personal…” and non-personal Metaverses with the username, e.g., “randomusername62…” .
Eliminate any extra spaces at the beginning or end of the link, otherwise it will not work!
Multiverse Public Domains – Door Images & URLs
If you want to link your door to popular Multiverse destinations like Grand Central, Outdoor Cinema, Zombie Town, etc., check out our Public Spaces Tutorial for a list of door images and URLs.
Linking to Another Meta Quest App or Game
This is an amazing feature within Multiverse — it means you can jump directly to a different app without having to go via the app store.
To do this, you’ll need the App ID.
Using THE FLIP as an example: visit the Meta Quest Store page:
https://www.meta.com/en-gb/experiences/the-flip/5419048904872022/ . The digits at the end (5419048904872022) are the App ID. Use that number to link to the game from a Multiverse door by selecting Oculus App Launch option.
Here are a few more examples:
StarChart: 1951863938215666,
Beat Saber: 2448060205267927,
Golf+: 2412327085529357.
Anyone who goes through the door will be taken directly to that app (if they already have it installed), or to the app store page where they can purchase it.

Metaverse FAQ & Troubleshooting
-
This usually happens when you log in with a different method than the one you originally used.
When you first sign in to multiverseonline.io, the login method you choose — whether it's Google, email, or Facebook (this option is no longer available for new users) — becomes your primary login. If you later sign in using a different method, you’ll create a new account, which will not include your original Metaverse, properties, or rooms.If you need assistance, contact us at support@ftl.ltd.
-
Storefronts can be reassigned between Metaverses within the same account. However, please note this process is neither quick nor free.
To learn more, refer to our Storefront Reassignment Guide. -
To change or cancel your plan, don’t use the "Upgrade" button on the homepage. Instead:
Go to the MANAGE tab.
Select PLAN, then click CHANGE.
You can now choose to upgrade or downgrade your subscription.
For step-by-step instructions, please refer to our Subscription Management Guide.
-
To request a Metaverse deletion:
Log into multiverseonline.io
Rename the Metaverse you want to delete to DELETE
Email us at support@ftl.ltd
⚠️ We don’t recommend deleting personal Metaverses or any with an active paid or trial subscription. Be sure to downgrade the plan first.
-
You can either upgrade your subscription plan or free up space by deleting existing content. To free up space:
Go to Drives on multiverseonline.io
Click on Uploads
Select and delete unnecessary content
Repeat this process in any Metaverse folders that also contain uploaded files.
Updated April 21, 2025